Hello new friend of RoboBrrd!


Congrats on your new RoboBrrd Kit! This set of webpages will guide you in how to build one. There are three main steps: building the chassis, assembling the RoboBrrd Brain Board, and programming RoboBrrd. You can be as creative with RoboBrrd as you want!

We check our kits thoroughly before they are shipped out. If there is something to your dissatisfaction, please let us know by emailing erin@robobrrd.com.

Note: you will need a FTDI cable to program the RoboBrrd Brain Board. We recommend the FTDI Friend or FTDI cable.


Some of the webpage is still under construction, so please bear with us as we try to get the documentation up as quickly as possible :)

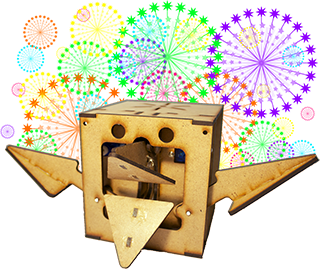
The first step is to start assembling the chassis of RoboBrrd, you can get started here!

Get started building!
Let others know you are starting your journey of building a RoboBrrd! They will be able to cheer you on along the way! :)

"I'm starting to build my RoboBrrd robot! w00t w00t!"

1. Building

In this section, video tutorials will guide you on how to build up your RoboBrrd chassis

Building

2. Soldering (part 1)

Get started with soldering the RoboBrrd Brain Board! Here we will list out each part, and start soldering in the components

Soldering (part 1)

3. Soldering (part 2)

There are more components to be added to the Brain Board, more steps to follow with accompanying photos

Soldering (part 2)

4. Soldering (part 3)

Even more soldering on the Brain Board!

Soldering (part 3)

5. Soldering (part 4)

The last part of soldering, and you will be able to power up your board and see the pin 13 LED blinking!

Soldering (part 4)

6. Extras (part 1)

RoboBrrd has lots of extras, like the LED eyes and sensors. Let's start soldering them together and adding them to RoboBrrd!

Extras (part 1)

7. Extras (part 2)

Last of the extras to solder, and wiring up the RoboBrrd

Extras (part 2)

8. Programming

Here we will learn about the code that we will use for RoboBrrd, using the Arduino IDE

Programming

9. Calibrate

Time to calibrate the servos using the RoboBrrd Dashboard software

Calibrate
 

10. Behaviours

Here we will add some behaviours to RoboBrrd to make it sense & interact with the world

Behaviours

11. Further

Time to hack and modify RoboBrrd! Here are some ideas

Further
RoboBrrd Kit Building I'm starting to build my RoboBrrd robot! w00t w00t! #RoboBrrd